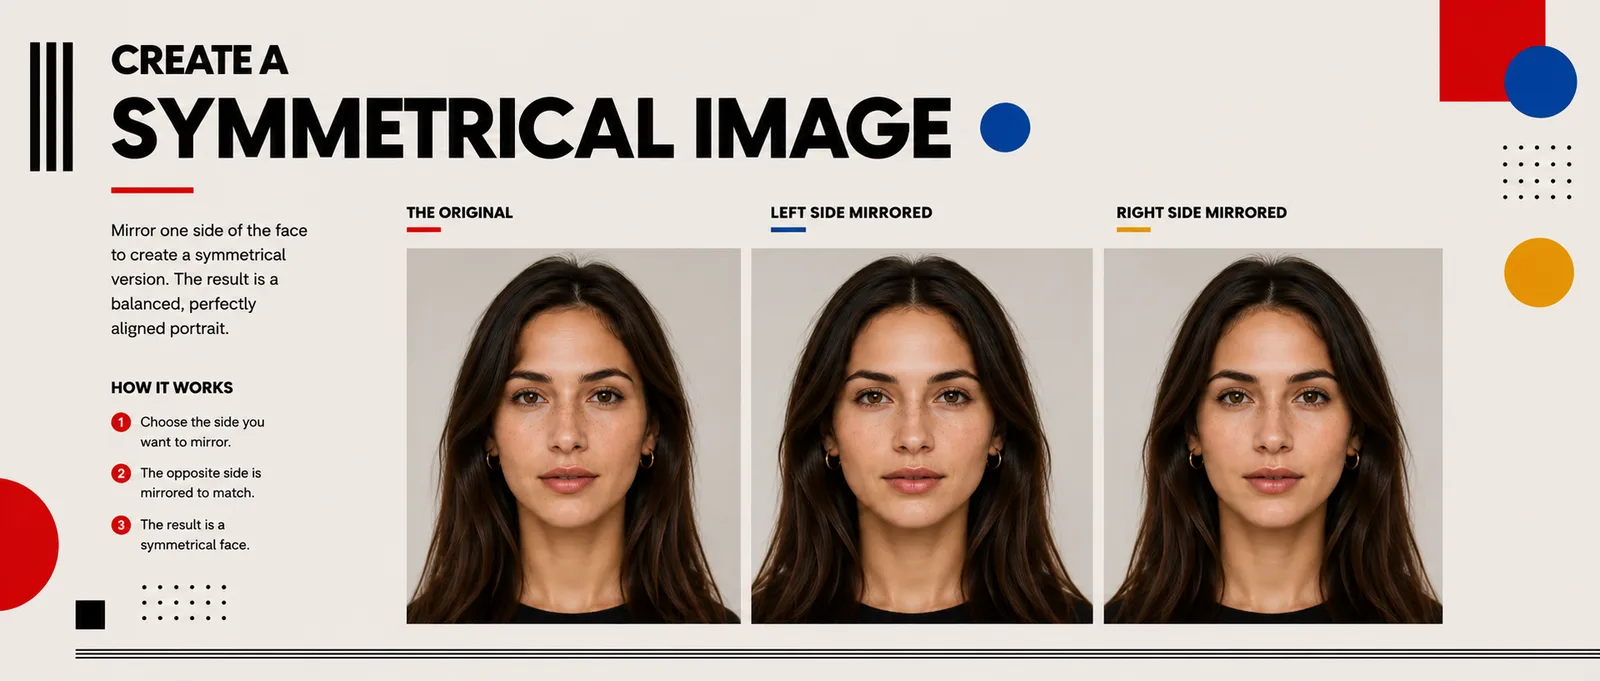
Assignment 07 | Retouching and Symmetry
Create Your Own Symmetrical Image
Photograph a classmate in soft light on Week 12, Tuesday. They photograph you. Then you retouch and mirror your own portrait in class on Week 13, Monday and Tuesday. Due Week 13, Tuesday, 9:00 pm.
START HEREOpen your one-sheetPrint it or keep it open while you work.Open ↗55 mm
the long end of the 18-55
Wide open
the lowest f-number at 55 mm
1/250 s
sharp, no shake
Auto ISO
the camera sets it
The goal
A plain, straight-on portrait in flat, soft light, so the two mirrors show exactly how your face really looks.
Step by step
Follow these in order. The red Watch out lines are where most students lose points.
01
Pair up and plan
You shoot your partner. Your partner shoots you.
• Watch my lighting demonstration in class before you shoot anything.
• Decide who shoots first, so you both get the full setup.
02
Set up flat, soft light
Like last year's soft-light portraits.
• Open shade or a bright overcast sky. Never direct sun on their face.
• A reflector on each side, the same size, the same distance and the same angle, so both sides of their face get the same light.
• Flat and even: no hard shadows under the nose or on one cheek.
Watch out: One reflector closer or bigger than the other lights one side brighter. The mirrors will show it.
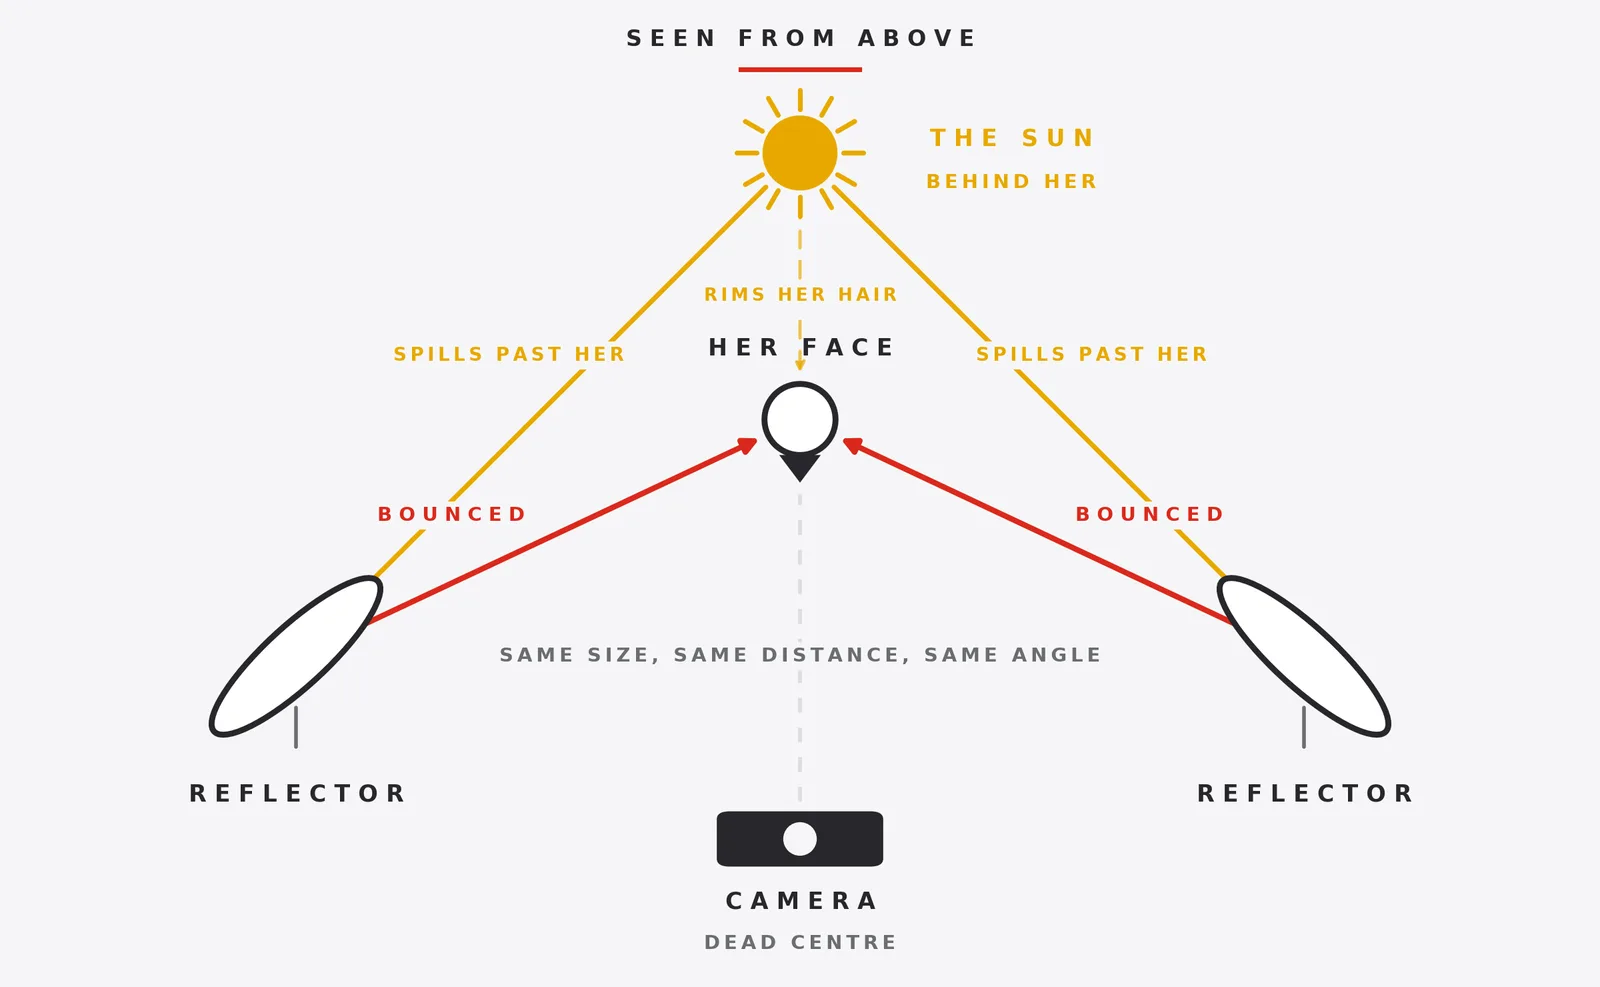
Seen from above. A reflector on each side, the camera straight in front of them.
03
Compose for mirroring
Plain background, straight on, eye level.
• A plain background: a clean wall or backdrop, nothing behind their head.
• Camera straight in front of them, at their eye level. Their face square to the lens, no tilting.
• Neutral expression. It mirrors better than a smile.
Watch out: A small tilt or turn of the head becomes a strange face once it is mirrored. Check their face is level and square before every frame.
Watch out: Camera above or below their eyes changes the shape of their face. Lower or raise the camera, not their chin.
Watch out: Leave room around their head. A crop that cuts off one ear or the top of their hair breaks the mirror.
04
Shoot several frames
Give yourselves options.
• Zoom all the way to 55 mm, aperture wide open, 1/250 s, Auto ISO.
• Shoot several frames with tiny changes in head angle, then swap places.
Watch out: Check the first frames on the camera screen at full zoom: sharp eyes, even light on both cheeks.
05
Swap files
Everyone edits their own portrait.
• Give your partner every RAW file of them. They give you every RAW file of you.
• Swap before you leave class, so you are both ready for Week 13, Monday.
Watch out: Copy the RAW files themselves. A screenshot or a phone photo of the camera screen cannot be edited.
06
Edit in Lightroom
Pick your best frame, then the whole photo.
• Choose the frame with your face most square to the camera.
• Global edit: exposure, contrast, highlights, shadows, white balance. Then export a JPG.
Watch out: Sliders pushed too far turn skin orange. If it looks edited, back off.
07
Retouch in Photoshop
The same steps as the practice portrait.
• Duplicate the background and leave the original untouched. Skin and hair on their own named layers with the Spot Healing Brush (J).
• Smooth the face only, then scale it back with Opacity. Lips through an inverted mask if your photo needs it.
• Stamp everything into one new layer on top: Cmd+Option+Shift+E. Name it FACE. This is the layer you mirror.
Watch out: Real skin has pores. Keep the texture, and remove what is temporary, not who you are.
08
Build the two mirrors
Follow the walkthrough below, one step at a time.
• Center guide, select one half of FACE, Cmd+J twice, flip, snap, merge, name it RIGHT. Then the same for LEFT.
• Canvas three times as wide, original in the middle, then export a JPG.
• Watch the video below before you mirror. It shows every step in order.
Watch out: Zoom to 100% on each seam. No gap and no overlap.
The full mirroring walkthrough. Keep it open while you work.
09
Submit and present
One Google Slide.
• Place your exported JPG on one Google Slide: your original, the left mirror and the right mirror.
• Download the slide as a PDF and upload it here. No links. Save your layered Photoshop file too.
• You present it on Week 13, Wednesday, and tell us what the mirrors revealed.
Check before you submit